Showing posts with label .22 RWS Superdomes. Show all posts

Sunday, 7 December 2014

Crosman 2240 Co2 pistol, The Most Moddable Pistol Ever. A Review


The Crosman 2240 is Co2 air pistol that only comes in .22, but will knock out a pellet at close to 6 ft/lb if you get a good one. This one tends to do around 5 ft/lb with medium weight pellets on a warm day, though as is the case with all Co2 guns, power drops with the temperature.  


That's 4.65 ft/lb on a cold winters day

Costing under £100 quid, you could easily spend up to four times that on replacing parts and modding the gun to your own satisfaction which thousands of owners have done, turning out some rather splendid guns, some of which are nothing like the original.

My basic model, this one is over two years old and has had a lot of use.

The pistol itself is a very simple design and one that Crosman and Benjamin have been using for many decades, though the 2240 is by far the sleekest model to date. It consists of a tube that holds the 12 gram Co2  and the 22XX valve, with a hammer and spring behind that and an end cap to hold it in place. The front end has a weighty knurled steel front cap which when screwed in pushes the Co2 cartridge against the valve to seal it.  First shot will pierce the Co2 capsule, then it's ready to shoot pellets at it's full power.

The front cap needs only to be fairly finger tight, though there is a slot so it could be made tighter by using a penny or a screwdriver with a very large flat head.

The trigger guard and pistol grip frame screw in with two screws from the underside; the pistol grips are ambidextrous  with a thumb rest both sides which sweep back in the way that modern pistol grips do. It is just as comfortable to hold and shoot in either hand and the trigger, though quite thin, is a crescent moon shape and is surprisingly comfortable to use, a bit like one you would find on a PO8 or Luger (same thing really). The safety is built into the frame and blocks the trigger, a typical Crosman design.

A design that has been going for decades on many American air pistols.

The breech is plastic and holds on with an Hex screw found in the loading tray, which itself is fairly spacious and loading pellets is a doddle. 

Pellets just drop in, even these 25 gr Norica bullet shaped ones, and they are very long.

The sealing O ring is found on the brass cocking bolt as is the way with the majority of single shot pneumatics. 

Bolt probe with seal and a hex bolt that connects the plastic breech to the body. Can easily strip if not careful when removing it.

The bolt handle is small but does the job, there is no spring but it locks into place in the L shaped slot on the right hand side, being only an annoyance to left handed people. The size, shape or material of the breech means there are no scope rails, though some scope mounts would bolt onto the 10 mm barrel if you want to scope the basic model. The Sheridan multi pump air rifles use the same block mounts.

Brass bolt and plastic breech, cheap but it does work.

The barrel sits in the breech and is supported by an ali barrel band that is held in place with a grub screw and protrudes past the main tube of the body.  It is cast and not of a high finish as you can clearly see the molding lines, same with the plastic breech as well.
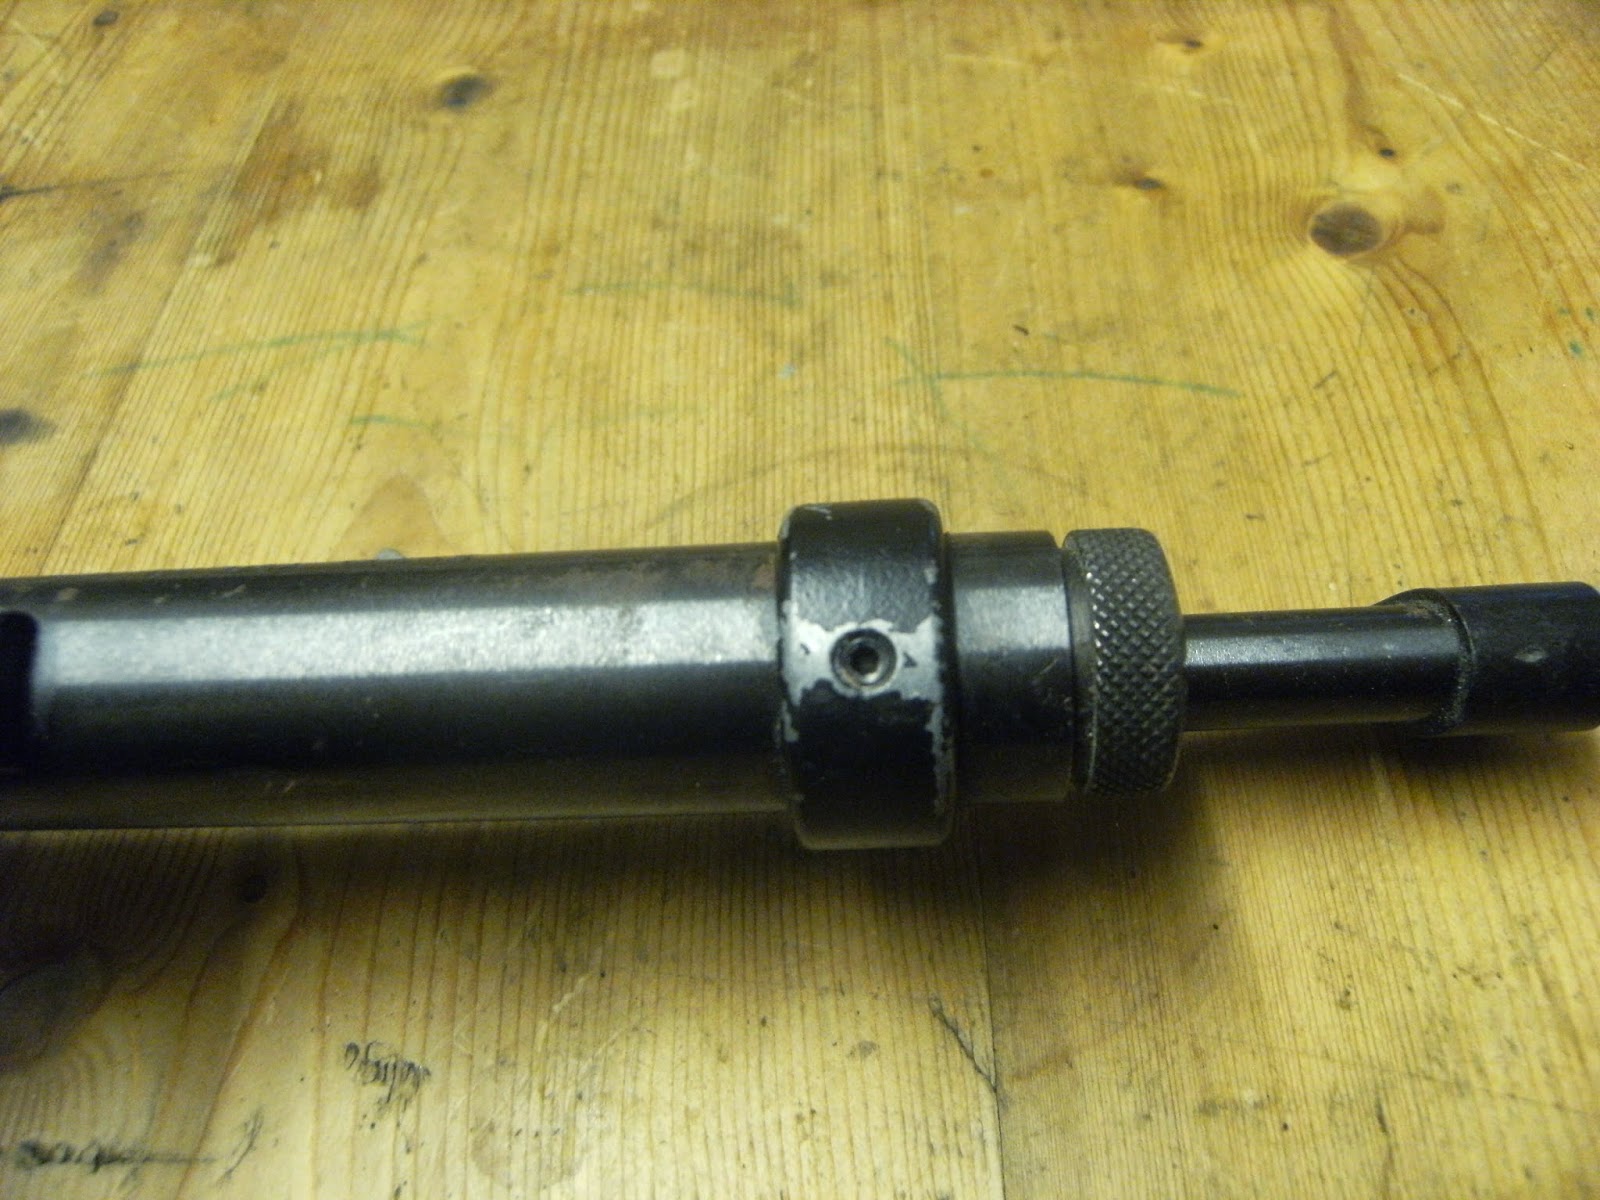

The one grub screw is ample to secure the short barrel in place.

Over the front end is a plastic ramped sight with a square post, which has a tendency to be knocked out of place at times. 

The front sight which is not glued or heat shrunk in place and annoyingly moves, suppose its an easy way to adjust the windage.

The rear sight is a flat piece of steel that screws into an adjustable plastic mount at the rear of the breech. Adjustment is made by loosening the screws and moving the sight to the desired position by small nudges then tightening again. I tend to find it annoying if truth be told, but on the bright side you can flip the rear sight upside down giving you the option of a square notch or a hole for a simple peep sight.

The rear sight, loosen screws, adjust to taste then tighten. Tight enough so they don't move when knocked, but not too tight so you strip the plastic that is in abundance here.

At arms length the front post has a lot of space either side of it when viewed through the rear notch, so one could be smaller or the other a bit wider to increase accuracy. Practice can only improve your group sizes as you get use to the sights, a lot more practice in my case and a new glasses perscription as well!

Five shot group with superdome's with two hands free standing at 10 yards, vertical line is because power was dropping off (honest!). I got off three more shots then ended the test as I had no more Co2 capsules on me.

The basic pistol is moddable in countless ways without even buying any extras. A small screw and hex kit, some small round files and a cheapo Dremel drill and you're away. Though there are countless companies out there that sell upgrade aftermarket parts, you could end up spending a large amount of money doing one up. Access to a lathe and milling machine will save you loads if you have the knowhow to use them, but most people will order all their upgrades from companies such as Gmac http://www.gmaccustomparts.com/ for the UK market. In the US, the Crosman company itself now offer their own design yourself 2240 as home modding has proved so popular.

The starting point for some of the wildest air rifle and pistol creations out there.

Steel breech conversions are the most popular and make good sense as you can fit scope rings onto them; shiny brass replacement parts to bling up the pistol are another popular choice. With Gmac alone the possibilities are endless, with countless pistol grip designs, full stocks, extension barrels, conversion to HPA (high powered air, or something like that), muzzle breaks, power adjusters, shiny barrel bands and bits and bobs in brass or many adonised colours. As I say, the choice is never ending. If you look at the Ratcatcher Crosman 2250 which is being sold for 200 quid at the moment , you will find it's just the same valve, hammer, spring and tube as the 2240 pistol, but with a steel breech for mounting scope rings, a plastic fore stock and shoulder stock, and an 18 inch barrel which knocks the power up to 10 ft/lb from 6 ft/lb. As it is not a pistol any longer but a carbine rifle you can get it up to 12 ft/lb will a little fettling, I have heard of FAC versions of 60ft/lb which with a larger bore, a long barrel, and a bit of valve and transfer port fettling is entirely believable. 

The best conversion i've seen to date is one where it's made to look an AR 15, but it's all down to personal taste and it's only imagination that can limit any creation based on the 2240 chassis. But I like the basic model, it is accurate and is very comfortable to hold and shoot and fun. I have often taken it with me when taking the dogs on a walk around the woods where I can shoot, just shooting stones off walls or hitting small branches and leaves keeps my simple mind happy.

TTFN

Keep safe and warm, Wing Commander Sir Nigel Tetlington-Smythe

Friday, 10 January 2014

BSA Mercury, Friction in the Piston


And Finding The Most Accurate Pellet For a 70's British Springer


Out in the woods testing the .22 BSA Mercury.


I have done a far bit of tinkering with the .22 mercury, but i know it needs a little more. It's knocking out RWS Superdome's at 10.5 ft/lb then slowly dropping down to 9 ft/lb, this i'm sure is down to the tight fit of the rubber O ring piston seal

The new piston seal O ring below is a bit over sized.

 I've read that it's a common problem that the piston seal can be a little oversized when new, and i did have to use some force to push the piston into the compression chamber with this one. Most people usually put a tin of pellets through to wear the piston seal down, but i reckon in this case i would need nearer two tins of pellets before any wear is noticed on the O ring.

Repeatedly putting a 1000 pellets through the Mercury would get a little tedious to say the least.

My other option would be to dismantle the rifle yet again, and use wet and dry to wear the O ring down, i would need to turn the piston in the lathe and apply the abrasive to give it even wear, 

It doesn't look over sized when fitted on the piston head , but believe me it is.

Then i would size the piston now and again till it was just short of a sliding fit, so once the ruff edge of the seal had smoothed out after reassembly it would fit perfectly. 

I would rather avoid going through this rigmarole again.

My only concern for the rifle is for the thread on the breech block getting damaged with all this taking apart and reassembly, i also have a concern for the spring compressor because of the mighty preload.

These were good value and sorts out the problem of the scope rail dovetails being set too forward on the compression tube of the Mercury.

A 1970's .22 BSA Mercury has a barrel that is 5.6 mm as opposed to 5.5 mm that is more prevelent now a days, and the older pellets that were a tad wider are not available any more. Eley Wasps in the blue tin are sized at 5.6 mm but are crap compared to how they used to be, 

No 2 5.6 mm Eley Wasps are not the pellet they used to be.

i have found that RWS Superdomes fit just as well in the breech and are infinetly more accurate. So with this in mind i reckon it would be best to see how the rifle performs after i put a tin of Superdomes through it, at 7 quid a tin it sounds like the fun option to me and i usually take a second rifle with me when i go down the woods.

Accuracy

   I have found the Mercury shoots most consistantly with a light hold and supported by my off hand just in front of the trigger guard, from personel experience most springers are more accurate for me if i support them at where they balance and this is where the Mercury balances out. The trigger breaks lightly and cleanly with no first stage travel so it's easier not to pull any shot of target, both my BSA Meteor and the Webley Hawk have similar triggers to this so i reckon it must be some British thang.

Ready for the off.

Testing the accuracy in the woods means i can't test from a bench rest, but the results will be more indicative of how it will perform in a hunting situation. The rifle was sighted for 28 yards and i will test at 15 yards and 30 yards, and with the shelter of the woods i don't have to worry about wind effecting the results.
Resting the rifle, uncocked and unloaded, while i go of to check the target.

Using the large cardboard boxes that were left over from Christmas presents as targets i took Scatterbone down to the woods and paced out 15 yards, 

Handy large cardboard box left over from Christmas, inside is foam packing and a piece of ply wood, after a few tests i can stick targets to it with the Gaffer tape i always carry around with me. As i say," If counceling won't fix it, Gaffer tape will."

i shot from a sitting position with my back against a tree while holding the rifle lightly with my off hand supported on my left knee. Out of AA Diabolo's, Falcon Accuracy Plus, Eley Wasp's, and RWS Superdomes, i found the Superdomes to be the most accurate in the 5.6 mm barrel of the Mercury. 

RWS Superdomes in any caliber are the best all rounder in my opinion.

At 15 yards 6 shots came inside the size of a two pence piece with the Falcon's coming a close second, the Eley Wasp's were all over the place thinking i had lost my mojo but then the the Superdomes did it again.

I'm pretty happy with these results, cleaning the barrel and perfecting my hold will improve results no end.

I tried to test the Mercury out to 30 yards but it was pretty windy even in the shelter of the woods, with the wind push the pellets two inches over to the left. I managed to do some shots compensating for the wind and managed to get on target, but as it was i was well chuffed with the results of the 15 yard shots. Having put just over half a tin of pellets through the Mercury since i last tinkered with it i have found the best hold for me, being happy with that i reckon i should just put an other couple of tins through it till it beds in and the velocity rises and settles down. I really would like to keep this air rifle as the surge and recoil are quite mild and as a .22 it carries a lot of knock down power down the range, and above all it looks bloody sexy for an air rifle.

TTFN

Wing Commander Sir Nigel Tetlington-Smythe.   

Sunday, 30 June 2013

BSA Mercury, The Final Stages

For now.........


Sweet looking air rifle

When last i wrote a blog i had just finished fixing up the BSA Mercury, and left off with popping in the breech seal. However i realised i had forgotten to order one, just missed it out on my order from J Knibbs. So in goes another order for a Titan XS mainspring for the Weihrauch HW35, a flip up red filter for my gun lamp, and two generic BSA breech seals, I got two as i have a BSA Meteor which would benefit from a new one as well.

 When i gave the original Mercury breech seal a close inspection i could see why it needed replacing, one half of it looked liked it had been filed flat so one side was flush with the breech face and the other side protruded a smidgen to where it should seal. 

Worn old breech seal

When i placed a cigarette paper over the breech to see if any air escaped when fired, it didn't just move it, it shot into the air, and that was with me gently holding the paper to the sides of the breech with my fingers.

Ready to replace

The generic breech seals are made from a firm rubber and are white, where as the original is a black harder harder material, but that may be because it has aged and hardened. 

Two new breech seals, i have a Meteor as well.

It's a folded over circular seal with a small slit on the inner fold, and the fold is the side of the seal that faces the outer side of the breech. The old breech seal had to be prised out and as it was so old it came out in small pieces and crumbs, most definately well past it's sell by date.

Oh crumbs!

Though once removed and cleaned the new seal just slipped in easily and straight away i could tell the differance between the old worn seal and the new one, standing just past flush from the breech face and making a perfect seal around the transfer port. 

New breech seal fitted

Cocking the rifle and loading the pellet then taking the shot i could hear the pellet hit the back stop with a lot more force than it had done before. Though i would like to point out that according to a very well known and experienced airgun tinkerer (known to some as T20) reckons that most Wiehrauch breach seals would fit even better to Meteor's, Airsporter's, Mercury's, et al, and give you an extra 1/2 ft/lb as they are made from tougher stuff and are a tad longer. Anyway read his blog 'Air Gun Tech' and you can see for yourself that him and his buddies know their minerals, it all makes sense to me, sort of.

I also made an order to Uttings for a 6x40 AO Nikko Stirling scope and a set of Accushot high profile off set mounts, the mounts arrived but i would have to wait another week or so for the scope as they were out of stock.

Lots of bit's that come with the scopemounts


Scope mounts in the box

I have discovered that after buying loads of economy scopes in the past that it's best to spend a little bit more, though you don't have to break the bank doing this. 6x40 is a good hunting magnification and Adjustable Objective is pretty handy for guaging the distance of your target, and being a little short sighted i can use a scope with AO with my glasses on. However they didn't have any in stock several weeks later, so i reordered a 3-9x40 AO Nikko Sterling and i can just leave it on x6 mag for hunting

Ready to fit the scope

The one piece off set mounts are crucial for BSA Mercury's and any other BSA with the curved trigger unit, as the scope rails are set to far forward for most people to use comfortably with normal mounts. In this case i  mounted an AGS 3-9x40 scope and with the off set facing backwards found it sat just perfectly for my head an eye to line up, two hex bolts clamp the mounts to the scope rails and two smaller hex scope stops screw down to add extra support on the top or the piston cylinder. The Accushot mount came with three allen keys and one spare hex bolt in each size, this was handy as i had a one piece mount with a striped hex head so i popped it in there. The hex head was a little thicker than the others but it does the job fine, and now i have a spare one piece mount for one of my other springers.

Out in the back garden i sat down at 27 yards from my target and trap and took some test shots with .22 Eley Wasps No2's, The scope was fairly close to the POI but the shots were stringing vertically and some went left or right which showed me this rifle would need at least half a tin of pellets to settle down and a very gentle hold, though when i tried some .22 RWS Superdomes i found the grouping was a hell of a lot better but still not upto anywhere good enough for hunting. Most Super domes fitted snuggly into the breech though some were looser and deep seated themselves. However i could feel the wasp's click in snuggly, but they can be seen by eye that they all differ or are slightly deformed in some cases, and would explain why I found this a little odd as old BSA barrels are 5.6 mm and Wasp No 2's are made for this and they just did not perform that well, where as the super domes that fitted deeply where falling into roughly 2 inch groups which was without a doubt an improvement.

With the new main spring and lube this rifle slams the piston home with force but there is no buzz or twang which is a bonus, but for a smoother lock cycle it is in need of a top hat and a slip washer and 3 or 4 coils removing. I feel this air rifle is now performing close to if not a little above factory specks, but give it a bit of running in to settle the spring in and short stroke the piston and its going to be a corker of an air rifle which is not so hold sensetive.

I mean, i shoot at a dot on a piece of paper and my shots appear to go all over the place, but if i place a few bits of 1 x 2 inch wood on the shelf in front of my back stop and i miss one every 5 shots. So it seems i can hit an inch size object better than i can group an inch circle on paper, and that's at different ranges to boot. Now that's all well and good out in a field of rabbits where i originally learn't to shoot well, but i have to garrentee i can do that with whatever air rifle i am using at the time in order to make a clean kill. Most of my air rifles will allow me to do that out to 45 yards in some cases, but with this rifle as it is now i wouldn't like to take the chance, even at 15 yards.

 It would appear that i still have a lot of work to do on this lovely little Mercury, and as this blog is all about my learning curve with working on air rifle dynamics and the improving of my knowledge of said objects. Then it would stand to reason that i will be squeezing a few more blogs off this gun.

TTFN

Wing Commander, Sir Nigel Tetlington-Smythe.