Showing posts with label O ring seals. Show all posts

Monday, 30 May 2016

Holdsy''s Innova


Hello every peeps, it's that time again. Time for a blog on another .22 Sharp Innova, this time it's gonna be completely stripped, resealed, overhauled to make it efficient as possible, and lovingly put back together.  Whilst not working on it in a sterilized enviroment, it shall be laid to rest on a bed of crushed velvet.

And this i had too collect from the Post Office as i was still asleep at 8.20 am when parcel force knocked on our door.

The reason for doing this is that it belongs too a fine chap who goes by the monicker of Holdsy, he lives in the flat lands of east England and had posted the action and two different sets of replacement seals for me to work with.

After unwrapping tape , box, and bubble wrap, this is what i would need.


Holdsy's Innova looked in excellent condition but had a few niggling problems with it,these were that it  took 10 pumps to reach the 12 ft/lb mark, the loading bolt had the wrong O ring seal and would not shoot back when the catch was released,\ after it had been left standing for a while.

Stripped Innova and tools used.

So seeing as i was sort these problems and reseal the exhaust valve i decided to strip his Innova right down, just to be on the safe side if you know what i mean.

One fat over sized rubber O ring replacing the original double set.

 This was just as well, as i found the front sight unit that holds inner and outer barrel, compression tube, and pump arm in place had one of its jaws broken clean off.
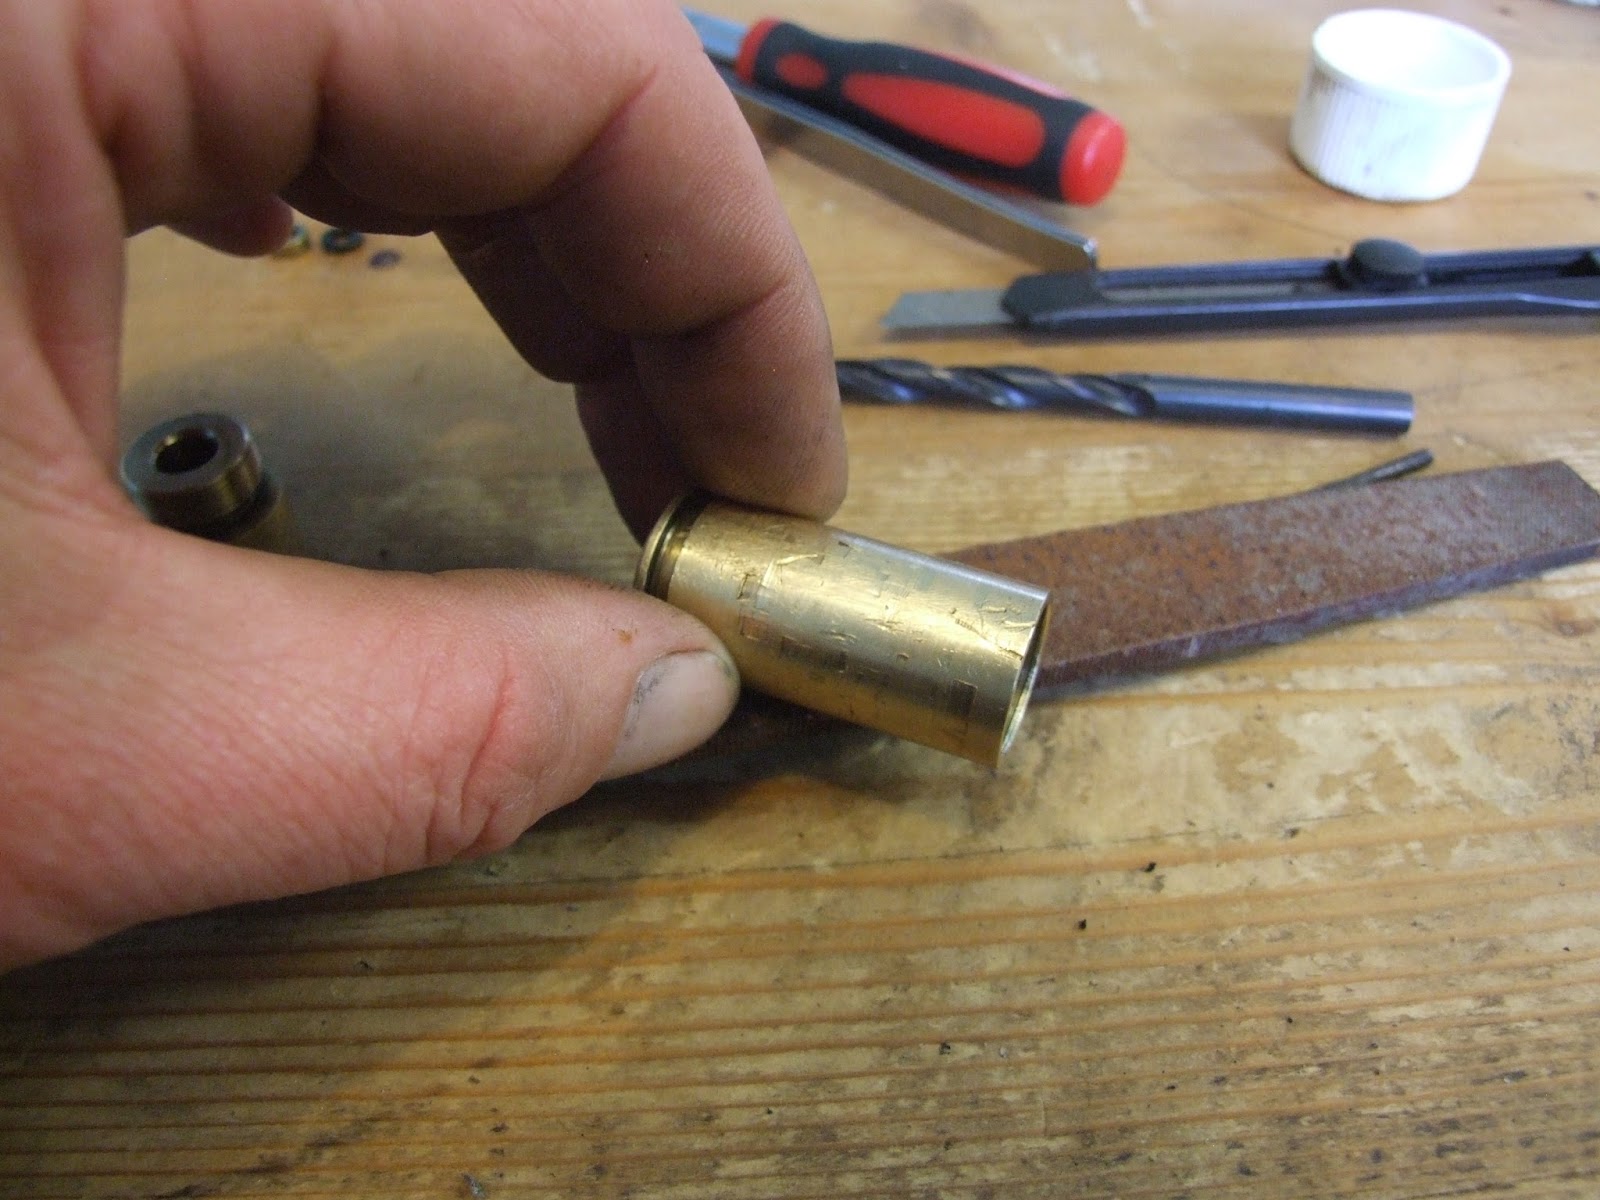
The front end cap that had the broken jaw, now as good as new...ish.

 However i managed to clean it in white spirit and glue it back in place, using a quality super glue made it as good as new, almost (i wouldn't go testing it with a hammer any time soon, but it will withstand the contant strain produced from the pump arm working).

Holdsy's .22 Sharp Innova stripped right on down, coulda gon further but it wouldn't all fit in the picture.

Holdsy had supplied me with both the T R Robb valve repair kit and the J Knibbs valve repair kit, i decided to use the T R Robb kit for the valve which has a firing pin and spring with it. As well as some silicone grease and bottle of lubing oil this in my opinion is the better of the two valve repair kits, this one i used on Holdsy's Innova valve

J R Robb Sharp Innova seal kit.

The J Knibbs kitt has a spare buffer plate and two sets of O rings for the loading bolt, i have seen at least three slight variations in bolt design on the Innova. Holdsy's Innova had one oversized O ring at the tip of the loading bolt, this was causing it to stick when the bolt catch was released.

T R Rob kit on the left, and J Knibbs kit on the right.

Two sets of two O rings of slightly differing dimensions should give you a set that would seal and not let it stick, the thinner of the two sets sealed perectly and stopped the bolt from sticking.

Loading bolt, bodge job O ring (that did seal well, too well), and the two sets of double O rings that came wih the J Knibbs kit.

I reckon the forward assist spring for the bolt was on the weak side, but seemed to be working fine now it was back in the reciever block.

A .22 Sharp innova with all original parts should give you roughly 12 ft/lb when the pump head is adjusted so the face of the pump head and inlet valve touch at the end of a stroke, this took 10 pump strokes to reach 12 ft/lb. So the first thing to do is adjust the pump head assembly to top out at 12 ft/lb, first releasing the bigger brass locking nut,


Unlocking the brass lock nut so the air release valve housing can be removed.

Then i removed the release valve outer body too check on the inner spring and blow off seal.

That spring holds back a lot of Pressure

All seemed hunky dory there so i screwed it back in place, and set to adjusting the rod assembly length so pump and valve touched ( 217 mm).

The air release valve housing about to be locked in place with the brass locking nut.

Working out the the length took a hell of a lot of tiny adjustments but once it was found the rest was easier.

Silver lock nut holds the air release valve securely in place.

Once the blow off valve was set to ones desired muzzle energy, the silver lock nut on the rod could be loosened and the newly adjusted release valve unit could be moved so the whole assembly reached the magic 217mm. 

However something was amiss, Holdsy's Innova would only reach 12 ft/lb after six pump strokes. This would be more noticable if one wanted to go FAC which would take 20 instead of 12 pump strokes to reach 20 ft/lb (pellet dependant).

I took it apart again to make sure the firing pin was well clear of the transfer port, i took the compression tube out to make sure the air inlet hole in the barrel was properly aligned with the transfer port in the breach block, i even took loads of measurements with the vernier calipers to make sure everthing internal was in the right place. I was stumped, i hadn't a clue  what was up.

So i looked at the trigger, for change is as good as a break after all. It's a lovely trigger because it's the first Innova trigger that still had it's first stage  adjustment screw still in place, 

The trigger adjustment screw does make a difference.

Just one more thing that makes Holdsy's Sharp Innova so nice, Triggers that release an exhaust valve get stiffer the more pump strokes one adds, so adjusting the first stage shorter is a lot of help and therefore a little easier.

Another view of thefirst stage trigger adjustment screw.

  
Eventually i realised what the problem was with the needing two extra strokes to make 12 ft/lb was, it was fitted with a later J Knibbs parachute style pump head seal. The outside face of the air inlet valve has a flat surface with the last two mm bevelled backwards at outer circumference, 

This is the shape the pump head seal has too mirror for best results.

the original sharp pump head seal, and even the T R Robb replacement O ring pump head seal sit flush even at the bevelled circumference. There will be trapped air the same PSI that is stored in the exhuast valve body in the V of the parachute pump head seal and the bevelle on the valve.


The orinal Sharp Innova pump head is made from Black delrin type plastic, but when it's damaged the whole thing is junked and is bloody impossible to remove without destroying it.

The T R Robb pump head seal is made from stainless steel with two rubber O rings used to seal it, pretty much the same set up as BSA Meteors and Mercurys use on their piston head seals. You also need to cut an half inch UNF thread into the pump head assembly for it to fit, looks the best though i've never fitted or used one yet. And they don't work on the newer Webley Rebels either.

The J Knibbs pump head seal is made of an  orangey red delrin type plastic and just clips into place, though just like the Innova seal it's a bitch to remove. If you don't mind six/seven pumps per shot they are fine, and half the price of the T R Robb seal

I'm sure there was a lot of fiddling about with this rifle that escapes my mind at the moment, as i had it for about four weeks and tinkered with it most other days. But the seals were changed, the bolt unstuck, overhauled and made as efficient as possible with what parts i had to hand. So that's it for now, and thanks too Holdsy for letting me work on his splendid Sharp Innova.

TTFN

Best wishes, Wing Commander Sir Nigel Tetlington-Smythe. 


Tuesday, 13 October 2015

.22 Sharp Innova, A Restoration Project. Fitting New O Ring Seals To The Loading Bolt


Removing the bolt from the Sharp Innova can be a time consuming, tedious job; the majority is easy but the the little catch spring can be a total bitch to remove. This job could lead to thoughts of homicide or even suicide, but just count to ten and take deep controlled breaths and all should be well.

First, remove the the small flat head screw that holds the catch in place; this sits below and to the left of the loading bolt.

OK boys and girls, are we ready to begin? This is the arse end of the Innova action.

This small flat head screw is about 15 mm long, when I was unscrewing it I didn't think this screw would end.

Okay it's off centre but it is the right sized flat head.

Once the screw is out of the way, the bolt catch is free to move out of the left hand side, however the return spring will only allow a small amount of movement.

Tap the catch this way to make removing the catch spring easier.

I used a small pair of tweezers to pull the return spring out of it's recess point in the catch, this was not easy and needed a lot of care, time and patience.

Tease that catch spring down, it's a real pain but it can be done.

To remove the catch, the bolt has to be alternately pushed with a screwdriver and pulled with pliers, this also needs special care and attention.

Catch return spring out the way to make it easier for the catch to come out.

When the catch does finally come out, be aware that the loading bolt and srping are going to come flying out, so be careful to catch the buggers.

All the bolt gubbins once removed; there's supposed to be a tiny spring somewhere but fuck knows where that's gone.

Get the replacement seals ready for fitting; they usually come in .22 and .177 and the bolt needs two of whatever calibre you need, so I chose the larger two of the four I had on hand.
Replacement O rings in .22 and .177.

I prised the old seals off the loading bolt, they might not have looked worn but they were.

Prise those old knackered O rings off

Then applying a load of silicone grease over the two new replacement seals, I slipped them into place.

Lots of silicone grease and the two O rings just slip over, you don't really need loads of grease, it's just my preference.

I then popped the catch return spring into place ready for returning the loading bolt, though some might find it easier to do this after the bolt is in place.

If you do fuck the catch return spring up it can be replaced by a spring from a Bic lighter.

Then I slid the loading bolt return spring over the tip of the loading bolt and pushed it back into the bolt hole, it's important to push it in all the way ...

The bolt will only return if the nub at the bottom is aligned with the hole.

... this is because the bolt catch can pass through the recess in the bolt when returning it into the left hand side of the breech. Once the catch is in place you will need to tease the catch return spring back into it's recess, this is reletively easy compared to removing the bloody thing!

With the bolt pushed in the catch returns back pretty easily.


Now somehow, magically, the catch sits in the perfect place so it is lined up for the screw to be threaded into place; no waggling or teasing, it just sits there and the screw goes right on through and is ready for screwing in. 

That is one long naffing screw.


Once I had finished it, I put it over the chronoscope; low and behold, the loading bolt seals were losing me around one and a half ft/lb.

RWS Superdomes gave 11.6 ft/lb with 6 fps spread over ten shots.

Air Arms Diabolos gave me a high of 11.9 ft/lb with a 10 fps spread over ten shots.

5.6mm Eley Wasps gave 11.8 ft.lb with an 8 fps spread, though one did go over 12 ft/lb increasing the spread to 23 fps, but I put that one down to a freak of nature.

H&N Field Trophies gave 11.3 ft/lb with a spread of 10 fps.

So there you have it, I could not be more happier with results like these! Not as easy as refurbing the exhaust valve with all the fiddly bits, but a lot easier than having to sit through the Jeremy Kyle show.

That's it for now.


TTFN


Best wishes, Wing Commander Sir Nigel Tetlington-Smythe

Thursday, 24 September 2015

.22 Mk I Sharp Innova, A Restoration Project. Restoring The Exhaust Valve, A Detailed Guide.


This blog entry is going to be in as much detail as I can manage, as I want it to be the sort of thing that I would have found really helpful the first time I worked on the Sharp Innova. I have already stripped and inspected this air rifle in a previous blog entry HERE , so today I will repair the exhaust valve using the T.R Robb Sharp Innova seal repair kit and test the power output.

The T.R Robb exhaust valve repair kit, which consists of a stainless firing pin, exhaust valve spring, a red inlet packing seal, an inlet ball seal, two big O rings for the valve guide seal and chamber seal, and two small O ring seals for the transfer port and inlet valve seal. Also a blob of silicone grease for the seals and a small bottle of silicone oil for the pump rod seal.

It is important to have a clear working space so you can keep track of all parts that have been removed, I keep small parts in a tin as it's a real bugger if they get lost. I am lucky in being able to do my work on the dining table, however the dog thinks that the table is also his bed.

The dog whines a lot if I move him from his bed.

So here is the guide in all it's tedious, mind numbing, gut wrenching detail.

Remove the action from the stock. Then remove the circlip from the pin that connects the pump arm to the front of the cylinder. Drift out the pin with a suitable sized punch. The pump arm can now be removed through the pump slot in the cylinder - it may need to be wiggled a bit.

Pin and circlip already tapped out.

Next, drift out the smaller roll pin in front that secures the sight unit to the cylinder; this can be a bit stiffer but it will move more easier using the correct sized pin punch. 

Correct sized pin punch for the roll pin is important.

Grasp the sight unit and pull it from the cylinder, outer barrel and inner barrel. This may need a lot of wiggling if it's not been removed for a long time.


Pull the pump rod down to the front of the cylinder using the pump arm linkage and line up the pivot pin with the hole for the pump arm linkage and cylinder. Twist the brass pump arm pivot base a little so the pivot pin lines up with a hole on one side; only half of the pivot pin will be visible in the hole on the other side so tap it out from this side with a smaller pin punch. 

Old dart head makes an excellent small pin punch.

Remove the pump arm linkage from the pump rod and remove the pump rod through the front of the cylinder, push it out with a screwdriver at first, then pull it out the rest of the way.

Pump rod shouldn't be this greasy.

To remove the cylinder from the breech block, first remove the brass collar screw on the underside of the breech ...

Only finger tight , the stock screw locks the collar screw in place.

... then using a flat head screwdriver, remove the stud screw under this.

This stud screw appears to hold the whole rifle together.

Remove the spacer that sits between the bottom of the cylinder and breech block; use a thin blade to lever it out at first, then it should slide out by hand.

A little tab on the spacer is good for leverage.

Remove the cylinder with the exhaust valve inside from the breech block, this should drop into the breech hole and pull out easily, revealing the transfer port O ring on top of the cylinder.

Transfer port O ring seal is pretty swollen.

Unscrew the exhaust valve back guide from the cylinder end, this should move by thumb pressure alone.

If the exhaust valve back guide is ever too tight a tool can be made up to fit the two small holes.

Then remove the spacer with the bumper inside it, the exhaust valve spring, and bumper plate - these should tip out into your hand. Using a piece of dowl from the front of the cylinder, push the valve out of the back, then remove the firing pin from the exhaust valve.

Valve with firing pin, bumper plate, spacer with bumper inside, and exhaust valve back guide.


The exhaust valve unit consists of the longer air chamber and the shorter exhaust valve guide. Unscrew them; you might have to use mole grips at first as they can be tight.

Remove the valve spring and inlet valve ball from the air chamber ...

Split the valve parts to get to the air inlet valve parts.

... and the exhaust brass valve stopper and exhaust valve seal from the exhaust valve guide.

valve guide, seal, and stopper.

inside the air chamber, the inlet valve packing is held in place by the inlet packing stopper. Unscrew the stopper using a wide fat blade, and the packing should fall out.

Inlet packing washer well and truly stuck in there.

(In this case, the packing was wedged in tight and I couldn't even prise it out, I had to very, very carefully mill it out using a mini drill and small drill bit so as not to damage the air chamber.)

Note inlet packing washer dust around the air chamber.

Milling into one side of the packing then the other, it eventually came out, spinning up the drill bit, leaving me with a grubby air chamber.


Needs a bloody good clean.

Clean the area where the packing washer sits in the air chamber with white spirits to remove any crap that might hinder a good seal.

Kitchen towel wrapped around a pick really shifts that crud.

Prise off the exhaust guide seal from the exhaust valve guide and the chamber seal off of the air chamber.
  
Oh so handy pick in action.

Then, with kitchen towel and white spirits, clean the air chamber (inside and out), the valve guide, packing stopper and valve stopper thoroughly.

Decanting a bit of white spirits into the lid keeps the rest of the bottle clean.

I lightly ran the outside of the air chamber and valve guide over a file to smooth out any scratches caused by the mole grips

Wet and dry or sandpaper will do also.

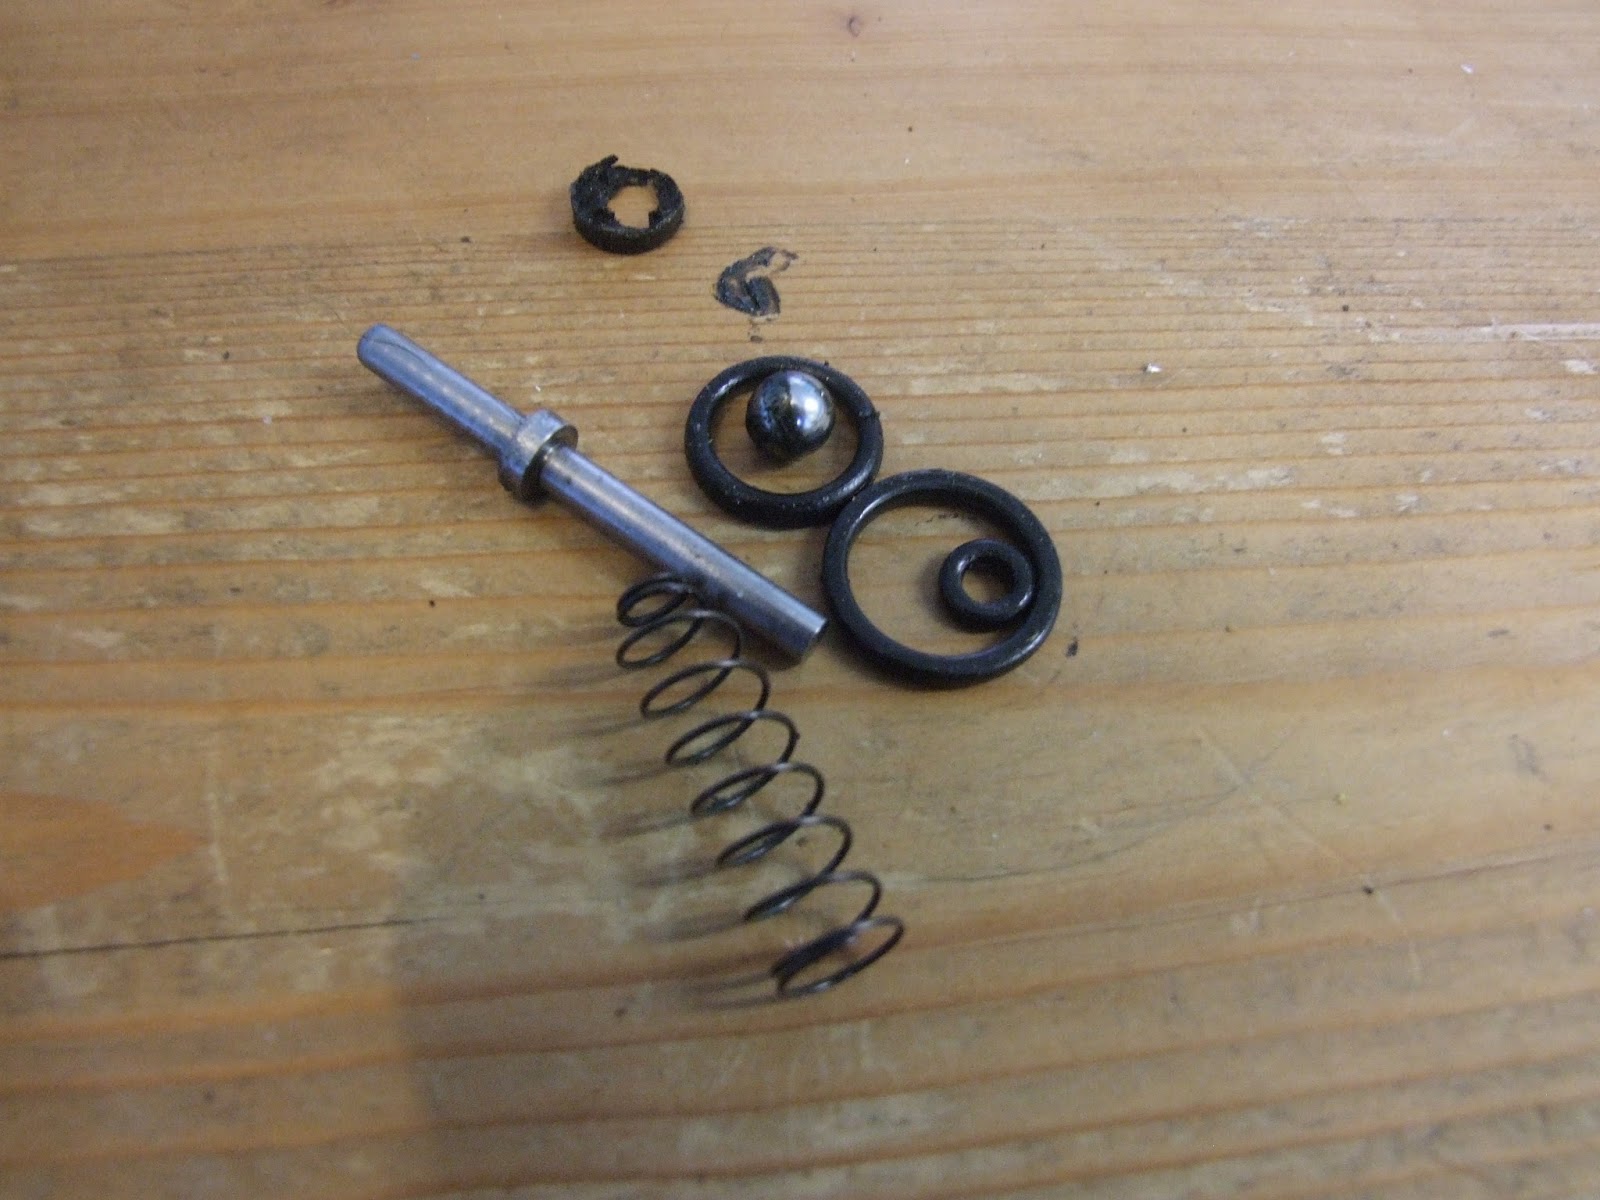
All the parts being replaced were put to one side; they consisted of the firing pin, the remains of the packing washer, inlet valve ball, exhaust valve spring, exhaust valve seal, exhaust guide seal and the chamber seal. 

Old worn parts, look at the state of that old packing washer.

Place the clean and replacement parts in order ready for rebuilding, along with a small blob of silicone grease for the O ring seals.


Lining up the parts for reassembly makes the whole proccess a lot easier.

Take the air chamber, insert the new packing washer and prod it into place.

That pick came in handy for prodding the packing washer into place.

Then the inlet packing stopper, guide it into place with your little finger.

Inlet packing stopper screwed in finger tight.

Then tighten it down using a wide flat blade.

Even tighter, though a chisel blade would be better than using the spacer.

Drop the inlet valve ball inside the inlet packing stopper to rest on the packing washer.

Inlet valve ball just drops in.

Place the valve spring on top of the inlet ball and put the air chamber to one side.

And so does the valve spring.


Take the new guide seal, thumb it over the screw thread of the valve guide and roll it into its recessed groove.

This is the smaller of the two large O rings.

Smear a dab of silicone grease over the new O ring seal.

The O ring spins around in it's groove easily.

Smear the new exhaust valve seal in silicone grease and pop it into the valve guide.

This is the smallest of the two small O rings.

On top of this goes the small brass valve seal stopper.

Seal stopper just pops in.

Align the air chamber with the exhaust valve guide so the valve spring sits on top of the valve seal stopper. Screw them together as tight as can be done by hand compressing the new valve guide seal.

Screw all the way un till there is no gap squashing the O ring for a good seal.

Thumb the new chamber seal into place, smear it with silicone grease and put the whole valve to one side.

The larger of the two big O rings is a tight fit

In order to get the best seal for the pump head and chamber seal, the inside of the cylinder needs a good clean. A few balls of kitchen towel soaked in white spirits pushed down the cylinder with a piece of dowel will loosen any crap ...

There was a lot of crap all in all.

... then ram a few dry balls of kitchen towel through until the inside of the cylinder is clean and shiny.

Ooooh, oh so shiny.

Pop the shorter end of the new firing pin into the valve guide end of the exhaust valve and align it with the back end of the cylinder, making sure the transfer port is aligned with the transfer port hole in the cylinder, and the same with the the stud hole.

Lined up correctly and ready for insertion.

Push it in until the stud hole appears in the bottom hole of the cylinder ...

That pick came in handy again for centering stud hole.

... it should be nice and tight with the new chamber seal fitted.

the longer end of the firing pin reaches the end of the cylinder.

Place the bumper plate over the firing pin and let it slide down to rest at the stop in the firing pin.
 
I must stop biting my nails.


Making sure the bumper is inside the spacer ...

This bumper only came out of the spacer if it was pushed out, some can be loose.

... insert it into the end of the cylinder to rest against the exhaust valve.

It really doesn't matter what order they are put in, as long as they're in the right order.

Place the exhaust valve sping inside the bumper to rest against the bumper plate, making sure the wider end of the spring is facing to the rear to rest against the exhaust valve back guide.

The valve spring must go in this way round.

Place the exhaust valve back guide on the spring, push into place and screw in by thumb.

Really needed that new exhaust valve spring, the old one barely pushed the back guide past the end of the cylinder.

Now the cylinder and valve can be returned into the breech, so with the old transfer port O ring seal out of the way, put a dab of silicone grease on the new O ring seal and press it in place around the transfer port.

The silicone grease helps the transfer port O ring stay in place.

When inserting the cylinder back into the breech, the cylinder is best pushed in along the bottom of the breech hole to stop the transfer port seal from moving out of place. The cylinder will stop short of the back of the breech hole, so pull the trigger and slide it back further until the stud holes in the breech and cylinder line up.

The hole in front of the stud screw is for a stud screw that pushes the spacer against the cylinder on most Innova's, not this one though.

Screw the stud screw back in lightly and slide the spacer into place so the forks of the spacer sit either side of the stud, then tighten the stud screw fully and screw the brass collar back onto the stud screw.

Only needs to be finger tight.

Fitting the pump rod, pump arm and linkage and front end sight unit is simply a reversal of the disassembly process.


I changed adaptors on my Deben Whisper silencer and fitted it to the action  so as not to piss off the neighbours, then it was off to the shed for a test of the muzzle velocity over the chronoscope.

The Deben Whisper comes with four adaptors, and I still can't use it on most of my air rifles.


Really must sort my shed out.

Two pumps gave me 257 FPS with 14.5 grain RWS Superdomes, which equates to 2.13 ft/lb.


Three pumps gave 392 FPS with Superdomes, which is 4.95 ft/lb.


Four pumps gave 463 FPS, which is 6.9 ft/lb.


Five pumps gave 501 FPS, which is 8.08 ft/lb.


Six pumps 550 FPS, which is 9.74 ft/lb


Soon after that the blow off valve cut in, but I was getting around 560 FPS by that time. This took the rifle up to just over 10 ft/lb.

Fitting new O ring seals to the loading bolt should up the muzzle velocity, given the state of all the other O ring seals they are most likely failing at the moment. Then if the muzzle velocity still needs to go up, I can adjust the blow off valve higher.

TTFN

All the best, Wing Commander Sir Nigel Tetlington-Smythe.