Showing posts with label 4x 32 scope. Show all posts

Tuesday, 1 October 2013

SMK 15, Small plinker for Small People

My wife got a message from a friend of hers the other week asking if she'd know of anywhere she could sell her sons old .177 air rifle. He was no longer interested and Mum was aware of my hobby (obsession) with air rifles. Wife says " it's never really been used and it's got SMK and 15 written on it, oh and it's got a scope and gun bag with it". She won't get a lot for that I thought, i'd give her 20 or 25 quid at the most though I could suggest a few sites she could advertise it. Seems she was happy with 25 because a week later we're off to pick up the wife's new air rifle. I hand over 25 of our English pounds and in return I am given a very well padded gun bag with an unknown quantity of wood and metal inside it. Mmmm, this should be fun, I thought!

As it came, Rifle, Scope, Gun slip, and bits and bobs.

The SMK XS 15 Supergrade  air rifle is a junior size Chinese air rifle very much along the lines of the Webley Cub. For 70ish quid you get an air rifle and a 4x32 scope. Now this is an older version of the same deal coming with an extra gun slip, two packs of .177 darts, and an abrasive cloth for cleaning the gun. I would say it's about 10 years old owing to the fact that the open sights are not fibre optic, which to some people is a good thing. I reckon they're OK on some rifles, but I would be mortified if they were on my HW35, if you know what I mean!


The front sight is a square post in a hood on a raised slope and has no adjustment, apart from the post, the sight is made from a molded plastic which fits around the end of the barrel.


 The rear sight is adjustable for both elevation and windage in the traditional style and is also mainly composed of plastic, however it makes a clear and crisp sight picture when aligned with the front sight. The wheels turn with nice pronounced clicks, and there is no looseness to them at all.


When I tested the rifle, it was pretty accurate with open sights but with the scope fitted you could see the rifle could do with an internal overhaul, or maybe it was just typical of an old Chinese air rifle. We shall have to see.

The rifle having been stored for ages had tiny little rust spots all over it, so some very fine 000 wire wool and gun oil soon had those removed.


The wood was in really good condition apart from a tiny nick at the front of the stock.


I don't know what wood it is, most likely something cheap, but still looks of reasonable quality - the wood on my SMK multi pump is awful in comparison!


The SMK sign could be seen through the the half decent bluing. It has a blackness to it that is common to all SMK's I have found, not very deep.


The end cap is made of plastic along with the safety catch, the end cap being held in place with a steel pin.

 
The safety sets on cocking and pushes in easily at the rear like many Diana air rifles. I'm truly tempted to paint the white dot red but alas it is not my call.
.

The breech is held between the forks by bolt as opposed to a pin, which is always a bonus in my opinion, and a locking screw keeps the whole business in place.


The trigger is made of pressed steel and is not too heavy, it feels as if there are two stages to let off though I imagine there is no adjustment.The front screw of the trigger guard holds the stock to the action, along with two screws at the front which screw in diagonally up into front of the compression chamber.


The rubber butt pad is just what it is, made of rubber and screwed into the rear of the butt by two screws.

It doesn't need to be ventilated or anything fancy as this is a junior rifle and fires lightly with no major kick to it, and it takes very little effort to cock the gun.


The break barrel breech is held in place with a ball bearing and spring, which with the power this puts out should do the job nicely. Though wear and tear could see problems with vertical accuracy, which is a shame as the breech block is bolted horizontally.


The breech seal looks nice and healthy so I can't see any problems there for a while. In fact when I took the rifle out to the woods for some free hand practice it was surprisingly accurate at ten yards, and at 25 yards could hit a drinks can every time.


It's a junior plinking air rifle and does what it says on the tin. It's pretty solidly constructed and feels hefty in your hands and I must admit i like how it looks. The rifle feels small to me but will fit the wife nicely, I also have a Crosman 1077 which she likes to shoot as well.

I reckon that should do it for now and im sure I will be back with a blog on the internals of this feisty little bugger, that is if it's OK with the missus for me to take it apart.

TTFN

Best wishes, Wing Commander Sir Nigel Tetlington-Smythe OBE.

Friday, 20 September 2013

.177 SMK B45-3 Multi Pump Air Rifle- changing the seals.


It's cheap, It's cranky, it's made in China, Yippy! It's SMK


Mmmmm different.


I know it's been ages since I last wrote a blog, and believe me when I tell you this one took ages to write when I finally got around to it. So sorry for that, and I hope you find this as useful as I did working on it.


SMK B54-2 multi-pump with 4x32 scope


Oh the joys of owning a multi-pump air rifle, after learning all the ins and outs of the wonderful .22 Sharp Innova I am totally hyped up over this now obsolete SMK. The only info I have found online is a couple of YouTube entries by 'Weapons Collector' and a couple of sales spread over the last 8 years. So now I can put in my 10 pennies worth to this cheaply made Chinese air rifle.

Two screws that connect the stock.

The action is held to the stock by 2 flathead screws, one on the front of the trigger guard and the other onto the support mount for the compression tube and barrel that holds the rear sight.


Incomplete but still working rear sight

 The stock is made from some awful wood and coated in thick lacquer, it feels as light as balsa wood but is obviously a little tougher.

Not the best woodwork really.

 The trigger and sear is all in one and the spring to support it is set into the stock , however as direct sears go on explosive valves it is not too heavy a pull. However the trigger is very thin and could do with being a fair bit wider.

Trigger with it's direct sear


The ball bearing between the barrel and the loading port will mangle the heads of the pellets if you don't twist the mag anticlockwise, and will end up blocking the barrel up, so you can get away with loading 10 safely into the mag and load the way suggested. 


Ball bearing would be below the loading port in this pic.


To remove the back of the action, first remove the long screw that holds the metal lug that supports the spring against the sear, then remove the two grub screws that hold the rear of the action to the compression tube, and then remove the bolt and pin.

Long screw that retains the lug at rear, and one of the two screws that hold the rear action to the compression tube just below the loading bolt.


 The retaining lug, spring, and sear now slide out of the compression tube.


Lug, spring, sear, magazine with ball bearing, and spring above that.
Ball bearing which can go flying!

It's important to hold the magazine back to the front action as you work the rear action off, as the spring holding the ball bearing for rotating the magazine will go flying.


Bugger! where's that thick washer gone?

Out comes a thick black nylon washer, then using small thin nose pliers I unscrewed the collar that holds the firing pin housing in place.


Washers replaced with O rings.

                                                                                                                Originally, rubber washers were used to seal the firing pin housing as all the threads and seatings were set into the compression tube. These were old and crumbling and were one of the reasons it didn't hold air.

Valve parts fit into here.


 Having recently purchased a large set of metric O rings, I decided to replace them with rubber O rings.

All the pieces from action, valve, and sear.


 The collar screw presses the O ring against the firing pin housing and a seal against a shelf, which then supports a spring that holds a thick rubber washer against the inlet valve for the pump.


the little silver screw on the bottom of the front action that holds the firing pin housing in line.


The firing pin housing is held in place with a screw through the bottom of the action so it lines up correctly with the transfer port. There is a corresponding screw hole on top of the barrel housing.

Firing pin housing with hole that lines up with transfer port, this runs straight through the housing.


 This gives access to the transfer port which needs no seal due to two seals either side of the firing pin housing.


washer removed to show O ring seal and firing pin.

 There is an O ring supported by a metal washer in the firing pin housing, sealing the pin. 


Metal disk with nipple holding broken seal.

With the firing pin housing now sealing the valve chamber, there is a spring that clips onto a metal disk, with a nipple on the other side that a rubber washer clips onto. This presses against a raised collar in the valve chamber and acts as an inlet valve.


Some inlet valve seals that didn't work.

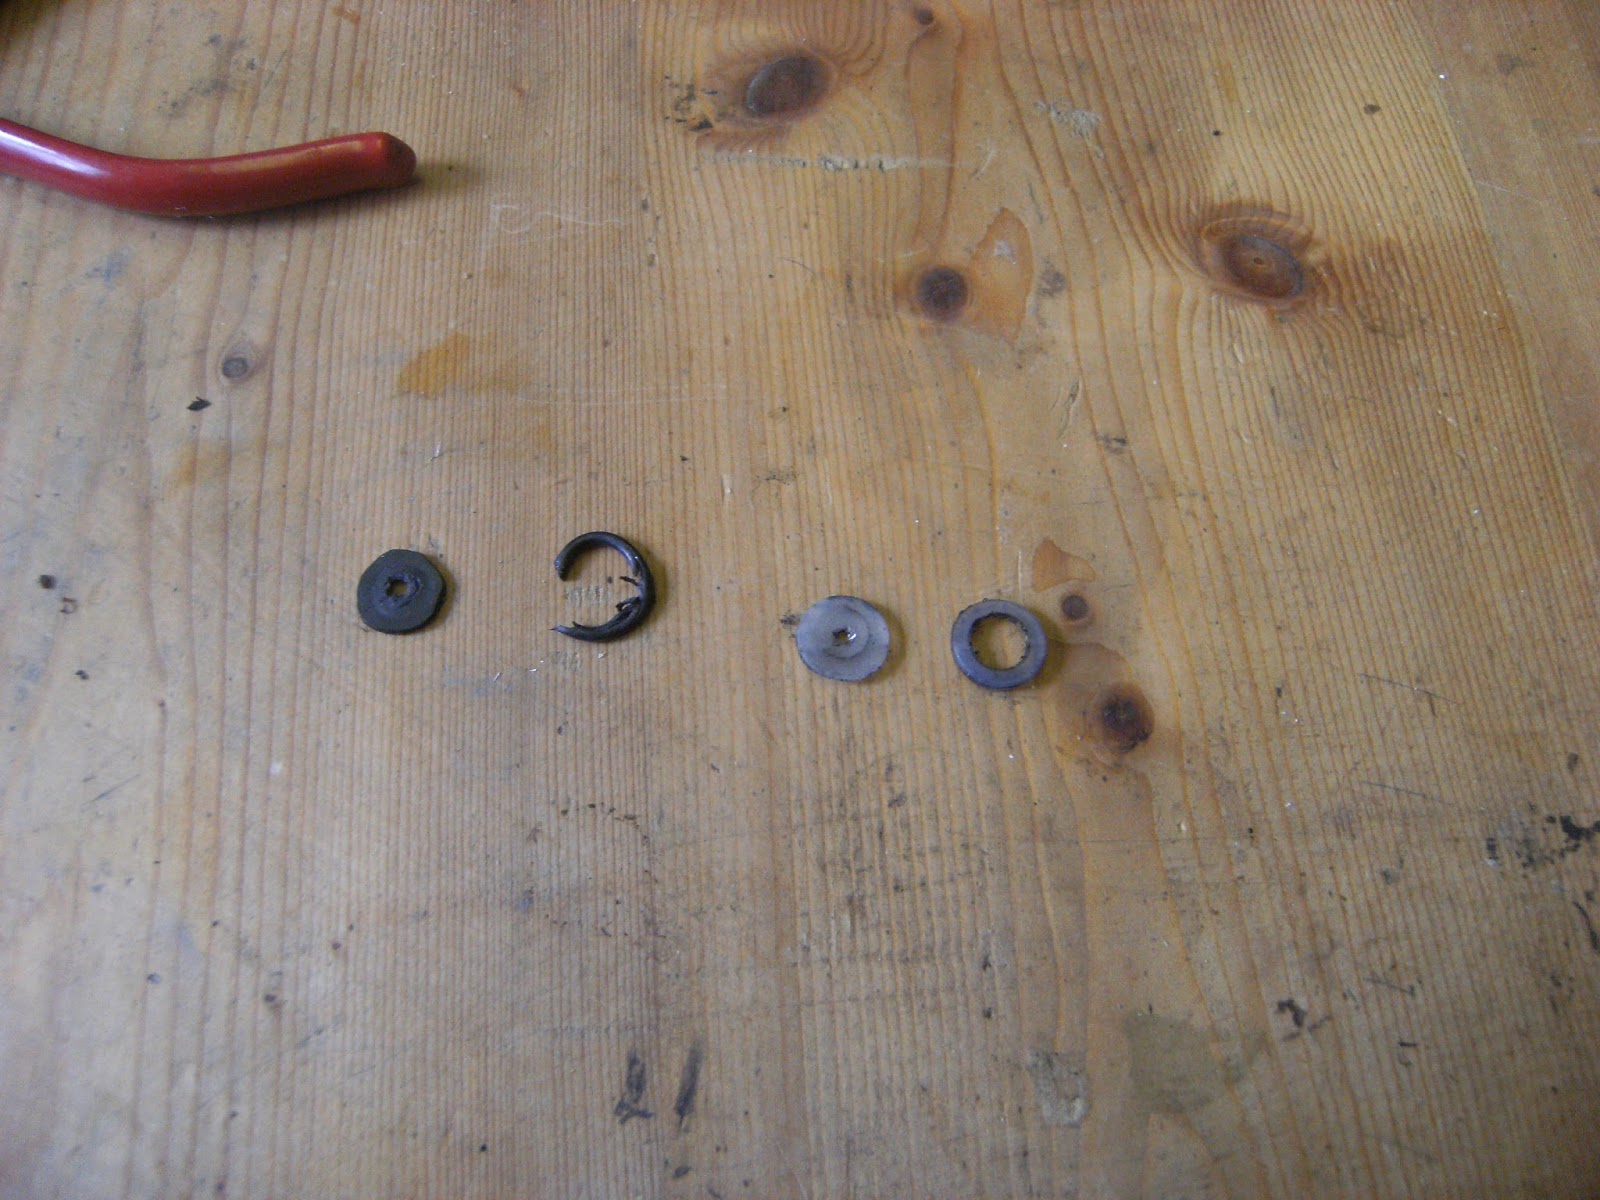
The original rubber washer was utterly mashed up, so I made a new one which only lasted 30 shots before the raised collar cut through it. I tried again with something thicker and harder but again it got cut through. Most recently I've used harder rubber with an O ring glued in place so it seals on the outside of the raised collar. Fingers crossed this should hold!

 Now, down the pump end there is one butt ugly pump arm, and the components of pump mechanism are made of delrin or some such material, though the pump head itself is in pretty good condition. Adjustment was easy once I tapped a pin out of the pump head holder and screwed it out. A small retaining nut holds it in place to stop it from moving.


Rubber pump handle can be a bit of a finger pincher.

There is some side to side play in the pump arm itself but this is only minor, besides, you only need about 6 pumps to get 11 ft/lb.

There is a whole load of stuff I could do to this air rifle as it is pretty accurate with a scope on it, I was pretty impressed considering what I have experienced from old Chinese air rifles before. There's also a lot to play around with to improve it to my own tastes, so when I get around to some i'll let you know.

TTFN.

Best wishes, Wing Commander Sir Nigel Tetlington-Smythe 


Sunday, 14 April 2013

Sharp Innova Dissassembly and Reassembly, Saved From The Dustbin

For a more detailed look at the Sharp Innova check out my more recent blogs '.22 Sharp Innova a restoration project' HERE  HEREHERE , HERE, or HERE

In my last order from J Knibbs  i decided to see if i could resurrect the Innova and got the complete seal and washer set, and a replacement pump head seal. With the back corner of the breech block chipped off exposing the bolt catch and unable to keep the spring in place, I wondered if it was beyond repair at all. But when I pushed the catch up and it held the bolt I thought why not, besides, I could always attach a small plate to hold the catch spring in place or something. But first sort out the valve as it would only hold under one pump of pressure which would slowly leak out, it sounded like the inlet valve was broken but it had to be taken apart to see. I had heard good reports about how good these Japanese Multi-pumps were, dispite all the plastic used to make them.

Step one was to open the pump arm all the way open so no air was compressed in the compression tube, this makes it a lot easier to remove the pump rod unit. You can remove the pump cylinder and exhaust valve without taking the front end apart, but i decided to dissassemble it so i could clean and polish as much as i could.


front hollow pin, though the photo was taken when i reassembled

I tapped out the front hollow pin which holds the front unit to the compression tube, i then removed the hinge pin next to it. This is held in place with a circlip and holds the pump arm and the front unit inside the compression tube, it is made of solid plastic and could now be slipped off the tube, inner barrel, and plastic outer barrel.

Pin holding the underlever to the piston rod unit coming out through the hole for the pump arm pin

With the pump arm removed i could pull the piston rod unit back and disconnect the underlever, tapping the connecting pin through the pump arm hole. The pin does not line up perfectly with the cylinder holes, with one side lined up 3/4 of the pin was visible on the opposite side and needed a smaller pin to tap it out. The piston rod unit could now come out easily, not only did i need to replace the pump head seal but the rod was in need of straightening out a little. There was adjustment at both ends of the rod, so after clamping the rod in a vice for half a day to remove some of the warp i made some adjustments to lengthen the pump rod unit.

 The brass hinge end was given two complete turns after releasing the locking nut and then locked back again, and the seal end was given three complete turns again with the locking nut to secure it.So now to get to the exhaust valve in the compression chamber inside the breech, I thought removing the stock would be a good idea for a start.

Brass collar in front of the trigger with the grub screw square nut set in the breech housing in front of that
By removing the front crosshead screw on the trigger guard the stock was removed revealing a brass collar, which i unscrewed to reveal a screw thread sticking out of the breech unit, this has a slot for a flat head screw driver and secures the valve in the correct place in the compression tube. In front was a grub screw which goes through a square bolt in the receiver body to press against a metal spacer which forces the compression tube upwards in it's hole in the receiver, which has a tad larger diameter. This seals the tube and valve to the barrel, but unfortunately no spacer  slipped out when the screws were removed as it was missing. Anyway the compression tube came out easily with the breech seal O ring in place, the O ring was put aside and the new one from the seal kit was sized and made ready for when it was reassembled.

Transfer port O ring seal sitting between the compression cylinder and breech unit, no spacer though.
Getting the exhaust valve assembly out was pretty simple with no pump arm still attached to accidently close and send parts flying out while dismantling, i made this mistake a while back much to my regret. The exhaust valve back guide was just under finger tight and unscrewed easily but only the exhaust valve spring and the spacer sleeve came out, there was no bumper or bumper plate but luckily these items came with the seal kit. Pushing a piece of dowel down the front of the compression tube the valve unit slipped out the back, if the pump arm was still connected you could slowly close this to push the valve out.
Valve air chamber and guide with firing pin, spacer, exhaust valve spring, and exhaust valve back guide

The valve unit consists of the brass front end air chamber screwed to the brass valve guide block with an O ring to seal them, when unscrewing them its best to be careful of the valve spring that holds the inlet valve ball from flying out. Stone me! They were hard to get apart, in the end i had to use two sets of mole grips and twist them because they were joined so tightThe mole grips left marks on both parts, but i sanded them down with some wet and dry till the were smooth. Now i could unscrew with my fingers and carefully caught the spring and ball in my palm and put them aside, i teased the old O ring out with small flat head screwdriver after sliding the firing pin out. I removed the small brass collar and the firing pin O ring seal from inside the guide, cleaned the brass parts with white spirit, put in the new O ring seal with a spot of Molicote and brass collar, then put on the new valve O ring, and put that aside ready to screw back onto the air chamber.

The air chamber itself Has a delrin seat for the inlet valve that is held in place with a screw in collar  and is a guide for the valve spring, it has two slots opposite each other at the top so a flat blade  would unscrew it. Shining a torch down the chamber i could see small nicks on the delrin seat explaining why it would not hold air, there was no replacement delrin seat but i then i noticed an unaccounted fat do-nut O ring in the seal kit that would fit perfectly in the hole for the collar to sit on. So i unscrewed the collar and teased the seat out with a pin from the outside of the air inlet hole, removed the outer seal, and cleaned all the brass up with white spirit. Putting it back together was a case of popping in the new do-nut ring, screwing in the collar to seat it comfortably, cleaning the ball and dropping it in place with the spring on top, then screwing the guide back into the air chamber so they joined but were not over tight. Problem sorted hopefully.

I then cleaned the compression cylinder with OOO wire wool and white spirit on the end of a piece of dowel, then polished the chamber with autosol as i don't have any GN paste. I slid the bumper on the longest side of the firing pin and pushed it against the collar in the middle, the other shorter side was smeared with molicote and inserted into valve guide. Making sure the transfer port and screw hole were lined up correctly i put a smear of molicote on the O ring and inserted the valve into the compression chamber until the holes were aligned, in went the exhaust valve spring followed by the spacer with the new bumper plate snuggley fitting inside the rear,and finally the exhaust valve back guide was screwed back in less than finger tight into the rear of the compression cylinder so it was flush with the firing pin.

I smeared a touch of molicote to one side of the transfer port seal and put it in place, then with the trigger pulled back i inserted the cylinder into the hole in the breech leaving space between that and the barrel to keep the seal seated. The hole for the theaded screw was lined up when the exhaust valve back plate rested against the sear and then it was a matter of screwing in the thread and the brass collar over that, then placing the square bolt in it's space in the breech i screwed the grub screw pushing the compression cylinder nice and tight against the under side of the barrel and sealing the transfer port. Now with the cylinder in place i reattached the stock with the crosshead screw in through the front of the trigger guard and into the brass collar on the breech, i was left with four small O rings which were two bolt seals each in .177 and .22.

 Taking the pump rod unit i removed the pump head seal by working it side to side and pulling, it was a black delrin type material with a flat face slightly raised around the outside with a pin size hole in the center and pretty worn all round. The replacment was of the same material but was orange, it had a flat face with a parachute design around the outside which i imagine would leave a little more compressed air before the inlet valve. It was hard to press it into the pump rod unit by hand, so i placed it face down on a clean flat surface  and tapped the pump rod unit with a rubber mallet till it fitted in place. I smeared three or four drops of Abbey SM50 arond the pump head seal and pushed the unit up the compression cylinder, and put every thing back together by reversing all i did to when i took it apart making sure to oil the hinges and grease the pins as i did it


Sharp Innova restored to working order
I gave the innova four even pumps which became increasingly harder, but were still little effort by the forth pump locking and unlocking smoothly at the end of each stroke. I loaded a .22 RWS Superdome into the breech, which for its size and with a 4x32 scope mounted on medium Hawke mounts is surprisingly easy to do and squeezed the trigger. Luckily the pressure of the bolt sping pressing the bolt  against the bolt catch kept the catch in place, but this is not at all reliable and needs sorting. The rifle fired with a low to medium crack and the pellet hit the target board from 27 meters with a hard and loud whack, much louder than one from my .22 HW35 or .22 BSA Mercury sounds at the same distance.

 I can confidently say that this rifle certainly has the minerals, it just needs the missing parts replacing, and some thing done about the chipped off piece at the back of the reciever. I'm sure i can make these parts myself or at least the bits i've mentioned so far, because it also appears all the parts for the trigger adjustment are missing and i have no idea what they look like. Anyway these are things to do next and will without doubt become future blogs, and i'll be sure to take more photo's in future so it'll be easier to understand.

TTFN

Wing Commander Sir Nigel Tetlington-Smythe